How to Blur Background in PicsArt (Step-by-Step Guide)
Blurring the background is one of the fastest ways to make your photo look cinematic, aesthetic, and professionally edited. Whether you’re working on portraits, product shots, or travel photos,PicsArt offers a powerful blur tool that’s easy to use — even for beginners.
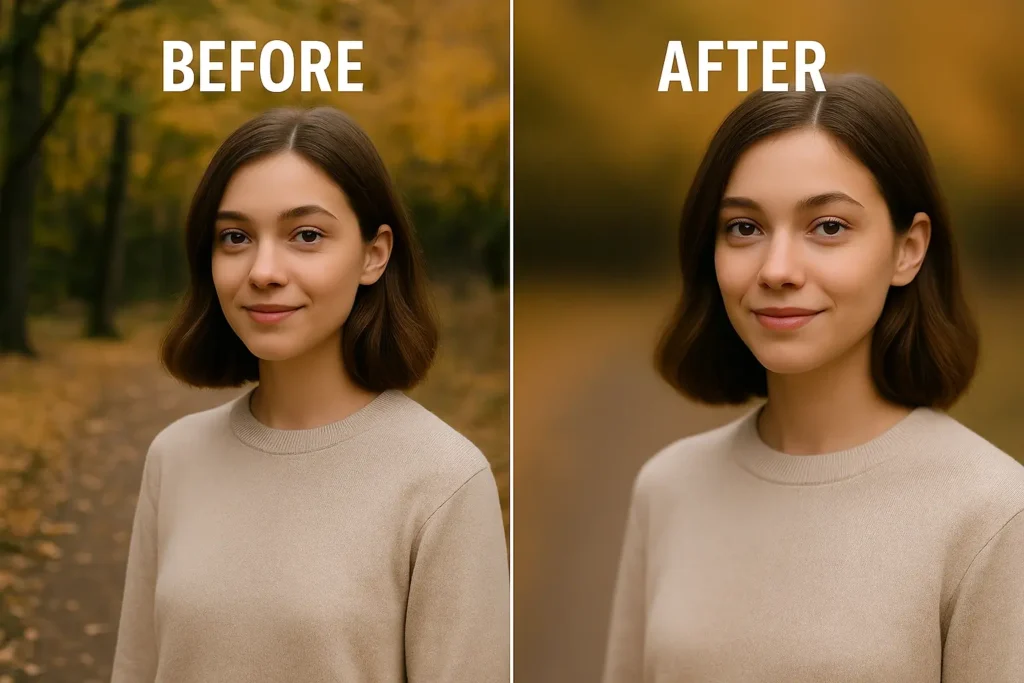
This step-by-step guide will show you exactly how to blur the background using PicsArt on Android, iPhone, and PC, so your subject stays in focus and your image looks stunning.
Why Use the Blur Tool in PicsArt?
The background blur tool isn’t just about style — it creates depth, highlights your subject, and adds a professional touch that usually requires DSLR cameras.
Benefits of blurring the background:
- Focus attention on the main subject.
- Add soft bokeh or cinematic depth.
- Perfect for social media (Instagram, Pinterest, TikTok).
- Easy to do without expensive editing software.
Unlike many other mobile editors, PicsArt allows you to control blur intensity, focus points, and style variations — all in one place.
How to Blur the Background in PicsArt
Step 1: Open Your Photo in PicsArt
- Launch the PicsArt app on your device (Android, iOS, or via emulator on PC).
- Tap the “Edit” icon and select the photo you want to work on.
- For the best results, choose a subject with clear edges (person or object).
Step 2: Select the Blur Tool
- Go to Effects in the bottom menu.
- Scroll and tap “Blur”.
- You’ll see several blur options like:
- Normal Blur (soft background)
- Smart Blur (auto subject detection)
- Motion Blur (dynamic movement)
- Bokeh Blur (cinematic depth effect)
- Normal Blur (soft background)
💡 Pro Tip: “Smart Blur” automatically detects your subject, saving time on manual selection.
Step 3: Adjust Blur Intensity & Focus Area
- Use the brush or selection tool to choose where you want the blur effect.
- Adjust the intensity slider to control how soft or strong the background looks.
- You can erase parts if blur spills onto your subject.
For portraits, a medium blur gives a clean and natural look.
Step 4: Refine Edges for Realism
- Zoom in and use the eraser to clean the edges around hair, face, or clothing.
- For product shots, sharpen the object edges slightly for better contrast.
This step is what makes your blur look real and not like a cheap filter.
Step 5: Save & Export Your Photo
- Tap “Apply” when satisfied.
- Choose your export size and format (JPG or PNG).
- Share directly to Instagram, Facebook, or TikTok — or save it to your gallery.
Advanced Blur Techniques in PicsArt
If you want to go beyond basic blur, PicsArt Mod APK lets you:
- Combine blur + overlay filters for a cinematic effect.
- Use gradient blur to mimic DSLR depth of field.
- Blur background and add glow effects around your subject.
- Try double exposure for creative storytelling.
🚀 Bonus tip: Try blending blur with light leaks or lens flares to give your photo a premium, editorial feel.
Blur Background on PC Using Emulator
If you prefer editing on a bigger screen:
- Install Bluestacks or LD Player emulator.
- Download PicsArt Mod APK.
- Open the app and follow the same steps as above.
- You’ll get faster rendering, better precision, and easier fine edges with mouse control.
This is a smart trick many professional editors use.
Tips for Professional-Looking Blur
- Use a clear subject photo with good lighting.
- Avoid over-blurring — subtlety looks more natural.
- Keep the subject edge crisp.
- Add light leaks, gradient overlays, or filters after blur for a signature look.
- Always export in high quality for best results.
Conclusion
Blurring the background in PicsArt is one of the easiest ways to make your photos look premium and polished. Whether you’re a content creator, product seller, or just love editing, the blur tool gives your images a professional edge in just minutes.
Start editing with PicsArt Mod APK today — experiment with different blur styles, overlays, and effects to create your own signature look.
FAQs
Is the blur tool free on PicsArt?
Yes, the standard blur tool is free. Premium features may unlock additional effects, but the free version works well for most edits.
Does PicsArt Mod APK have extra blur features?
Yes, modded versions often unlock premium blur types like bokeh, smart blur, and gradient blur without restrictions. (Use responsibly and for personal editing only.)
Can I blur photos offline?
Yes, you can blur backgrounds in PicsArt without internet access after installing the app.
Can I use the blur tool on PC?
Yes — with an emulator or the official desktop app, you can use the blur tool with more control and speed.